- 7 Top Flite Golf Clubs XL for Improved Performance - September 28, 2024
- Top Flite Golf Clubs: Top 5 Reasons to Choose Them - September 28, 2024
- Top 3 Golf Club Fitters for a Perfect Swing - September 28, 2024
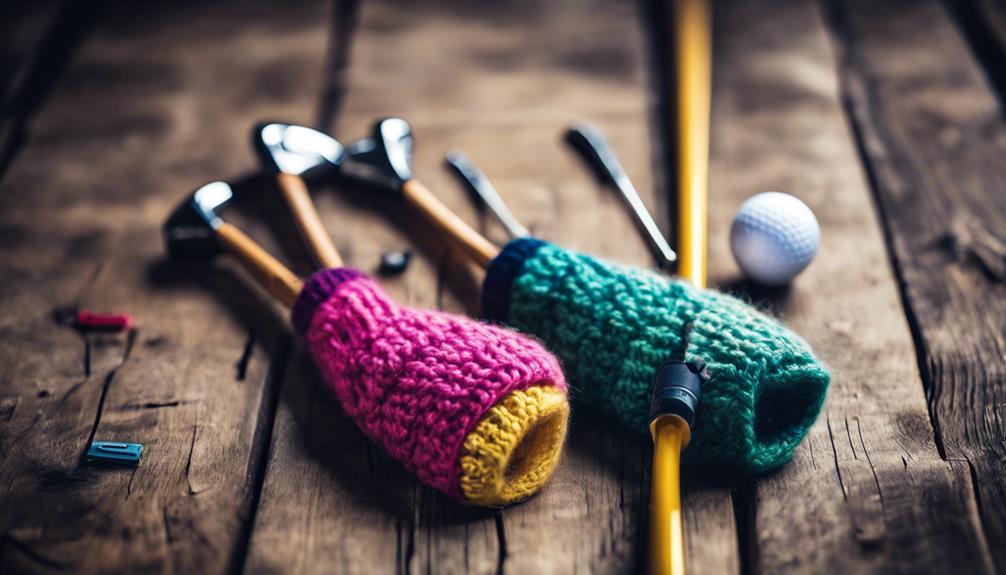
You'll start by gathering worsted weight yarn, knitting needles, and a few essential tools. Next, cast on the required number of stitches and knit in the round to your desired length. Add ribbing for a snug fit, and increase stitches to accommodate the club head shape. Decrease stitches strategically for a tailored top closure, then finish with embellishments like pom-poms or embroidery. Finally, block your cover to preserve its shape and durability. By following these 7 steps, you'll create a custom headcover that's both functional and unique. Now, get ready to take your knitting skills to the next level and create a headcover that stands out on the course.
Key Takeaways
- Cast on the required number of stitches using double-pointed needles and maintain consistent tension for a strong foundation.
- Knit in the round to the desired length, adding stripes or increasing stitches as desired, and experiment with ribbing patterns.
- Use stockinette stitch or ribbing techniques to achieve the desired body shape, and pay attention to color changes and stitch variations.
- Decrease stitches strategically using the k2tog technique to achieve a tapered effect and a snug fit that conforms to the club head shape.
- Block the finished headcover to preserve its shape and durability, and maintain it by sewing in loose ends and storing it in a cool, dry place.
Gather Essential Materials
Before starting to knit your golf club headcovers, gather all the necessary materials you'll need within arm's reach. This is crucial to save you time and frustration in the long run.
First, choose your worsted weight yarn in the desired colors for your covers. You can opt for a single color or get creative with stripes or multi-colored designs.
Next, ensure you have the correct knitting needles in sizes recommended by the pattern. Using the right needle size is vital to achieve the proper tension and fit for your golf club covers.
Furthermore, prepare a tapestry needle for finishing and weaving in ends. You'll also require scissors nearby for cutting yarn and trimming excess.
Finally, download or print a free pattern for golf club covers to consult during your knitting process. Having all these materials ready will guarantee a smooth and enjoyable knitting experience.
With your materials gathered, you're prepared to move on to the next step and start creating your golf club headcovers.
Cast On and Knit Body
Now that you've gathered your materials, it's time to cast on and knit the body of your golf club headcover.
You'll start by casting on the required number of stitches, then knit in the round until you reach the desired length.
As you knit, you'll have the opportunity to add stripes, increase stitches for a wider cover, or experiment with different ribbing patterns to give your cover a unique look.
Cast On Tips
With a clear understanding of the pattern and materials, you establish a strong foundation for your golf club headcover by casting on the required number of stitches using double-pointed needles. To guarantee a snug and secure fit, maintain consistent tension while casting on. This is vital, as it will impact the overall fit of your headcover.
Next, double-check your stitch count after casting on to confirm accuracy and proper sizing for the cover. This simple step can save you from potential frustrations down the line.
Following a specific cast on method will lay the groundwork for a well-fitted and stylish golf club headcover.
Knit Body Shape
You've successfully cast on the required number of stitches, and now it's time to focus on knitting the body shape of your golf club headcover. Now, it's crucial to follow the specific knitting pattern for the body of the cover, which may include stockinette stitch or ribbing techniques. Refer to your pattern instructions for the recommended stitch type and rows required to achieve the desired length.
| Knitting Pattern | Body Shape |
|---|---|
| Stockinette Stitch | Flat, smooth surface |
| Ribbing | Textured, stretchy surface |
| Color Changes | Alternate between 2-3 colors |
| Stitch Variations | Mix of knit and purl stitches |
As you knit, make sure the body of the cover is the correct length to fit snugly over the club head. Pay attention to any color changes, stitch variations, or shaping details specified in the pattern. These details will give your headcover a professional finish and guarantee a secure fit. By following these steps, you'll create a beautifully knitted body shape for your golf club headcover.
Ribbing Pattern Begins
As you begin to create the ribbing design, cast on the necessary number of stitches to guarantee a snug fit around the golf club head. The ribbing design is essential for providing elasticity, ensuring a secure cover that won't slip off during play. To achieve the right fit, make sure to cast on stitches that will allow the ribbing to stretch comfortably around the club head.
Once you've cast on the stitches, start knitting the ribbing design. This textured pattern adds structure and style to the headcover, giving it a professional finish. As you knit, focus on maintaining a consistent tension to guarantee the ribbing lies flat and even.
After completing the ribbing, you'll move on to knitting the body of the cover in stockinette stitch. This smooth, sleek stitch will provide a beautiful contrast to the textured ribbing. The result will be a headcover that's both functional and visually appealing.
Add Ribbing for Snug Fit

Now that your headcover's body is complete, add 2-3 inches of k2, p2 ribbing to the top to create a snug, adjustable fit around your golf club head. This ribbing will provide elasticity to the fabric, allowing it to stretch and conform to the shape of your club head.
To begin, knit two stitches, then purl two stitches, repeating this pattern for the desired length. As you work the ribbing, you'll notice the fabric start to take shape, creating a comfortable and secure fit around the club head.
When you've completed the ribbing, you'll have a headcover that fits snugly around your golf club, preventing it from slipping off during play. The k2, p2 pattern is ideal for golf club headcovers, as it provides a comfortable and adjustable fit that can accommodate different club head sizes.
With the ribbing in place, you can be confident that your headcover will stay put, even in windy or wet conditions. By following these steps, you'll have a beautifully crafted golf club headcover that not only looks great but also provides a secure fit.
Increase Stitches for Club Head
To accommodate a wider golf club head, you'll need to increase the number of stitches in your headcover, a process that requires careful planning to maintain the shape and symmetry of the finished product. To do this, you'll knit into the front and back of the same stitch to add an extra stitch. This will guarantee that your increases are evenly distributed across the round.
| Increase Round | Stitches per Needle |
|---|---|
| 1 | 12 |
| 2 | 18 |
| 3 | 24 |
| 4 | 30 |
Follow the pattern instructions for the specific number of stitches to increase and the rounds to do so. It's crucial to increase stitches gradually over multiple rounds to prevent puckering or distortion in the headcover. Use a double pointed needle to manage the increased stitches and keep track of the total stitch count to achieve the desired size for the golf club headcover. By doing so, you'll achieve a smooth, even fabric that will fit your golf club head perfectly.
Decrease Stitches for Top Closure

Now that you've increased the stitches for the club head, it's time to decrease them to create a snug fit at the top of the cover.
You'll do this by knitting two stitches together at regular intervals, following the pattern instructions for the number of decrease rounds needed.
As you decrease stitches, you'll create a tapered shape that will guarantee a secure fit around the club head.
Decreasing Stitches
You'll begin reducing stitches for the top closure by knitting two together at regular intervals, a process that will taper the cover's opening and create a snug fit. This will guarantee a neat and secure closure for your golf club headcover.
| Decrease Rounds | Stitches to K2 together |
|---|---|
| 1st round | Every 4th stitch |
| 2nd round | Every 3rd stitch |
| 3rd round | Every 2nd stitch |
| 4th round | Every stitch |
As you decrease, maintain an even tension to prevent puckering or gaps in the fabric. Keep reducing until all stitches are closed, forming a neat and snug top for the cover. Once all stitches are decreased, cut the yarn, leaving a tail to secure the final stitch. Finally, weave in the ends to finish the closure. By following these steps, you'll achieve a professional-looking, tapered closure that will keep your golf club headcover securely in place.
Top Closure Techniques
With your knit golf club headcover taking shape, decreasing stitches for the top closure is the next significant step, which involves knitting two together at regular intervals. To achieve this, you'll use the knit two stitches together (k2tog) technique. This will create a tapered effect at the top of the cover, guaranteeing a snug fit around the club head. Follow your pattern instructions to determine when and how many stitches to reduce in each round. It's essential to reduce evenly across the round to maintain the shape and symmetry of the cover.
As you continue decreasing, you'll notice the cover start to take shape. Keep reducing until only a few stitches remain, then it's time to fasten off the yarn and secure the remaining stitches to close the top of the cover. Remember to follow your pattern instructions carefully, and don't hesitate to count your stitches regularly to ensure precision.
Snug Fit Achieved
By strategically decreasing stitches for the top closure, you're creating a tailored fit that will keep your golf club headcover securely in place. To achieve this snug fit, you'll need to knit 2 stitches together, reducing the total stitch count. Continue decreasing stitches evenly across each round until only a few stitches remain for closure.
Here's a breakdown of the decreasing process:
| Round | Stitches | Decrease Method |
|---|---|---|
| 1 | 60 | Knit 2 stitches together every 10 stitches |
| 2 | 40 | Knit 2 stitches together every 8 stitches |
| 3 | 20 | Knit 2 stitches together every 4 stitches |
| 4 | 10 | Knit 2 stitches together every 2 stitches |
As you decrease stitches, you'll notice the cover begin to take shape and fit snugly around the golf club head. Once you've reduced the stitches to a few remaining, use a tapestry needle to thread the yarn through the final stitches and secure tightly to close the top of the headcover. With practice, you'll master this decrease method and achieve a professional, polished finish for your knitted golf club headcovers.
Finish With Embellishments
Take your knit golf club headcovers to the next level by adding a personal touch with creative embellishments. You can add a playful touch with pom-poms or tassels, which come in a variety of colors and textures. These embellishments can add a fun and whimsical element to your headcovers.
Alternatively, you can experiment with different stitch patterns or incorporate buttons, beads, or embroidery to enhance the aesthetic appeal of your covers. Consider adding initials, logos, or specific patterns to customize your headcovers and make them truly unique.
The key is to use embellishments creatively to make your golf club headcovers stand out and reflect your personal style. Don't be afraid to try out new ideas and combinations – after all, it's all about adding that extra special something to make your headcovers truly one-of-a-kind.
Block and Maintain Covers

Now that you've added the perfect embellishments, it's time to block and uphold your knit golf club headcovers to preserve their shape, quality, and durability. Blocking is an essential step that helps shape your covers properly and gives them a professional finish.
To block your covers, use steam or light pressing to smooth out any wrinkles. This will guarantee they lie flat and even.
Next, sew in any loose ends to prevent unraveling and sustain the cover's durability. Take your time to secure each end carefully, ensuring they're tightly sewn in. This will prevent any loose threads from coming undone and prolong the life of your covers.
To maintain the shape and quality of your covers, store them in a cool, dry place. Avoid exposing them to direct sunlight, moisture, or extreme temperatures, as this can cause them to lose their shape or deteriorate.
Frequently Asked Questions
How Do You Dry Headcovers?
You dry headcovers by gently squeezing out excess water, then laying them flat on a towel to air dry and absorb moisture, ensuring good air circulation around them.
Conclusion
You've made it to the final hole! Your handmade golf club headcovers are now ready to tee off in style. Slip them on, and you'll be the envy of the course.
With your newfound knitting skills, you can create a whole set to match your unique swing. So, go ahead, show off your creations, and get ready for a hole-in-one in the world of golfing fashion!


