
- 7 Top Flite Golf Clubs XL for Improved Performance - September 28, 2024
- Top Flite Golf Clubs: Top 5 Reasons to Choose Them - September 28, 2024
- Top 3 Golf Club Fitters for a Perfect Swing - September 28, 2024
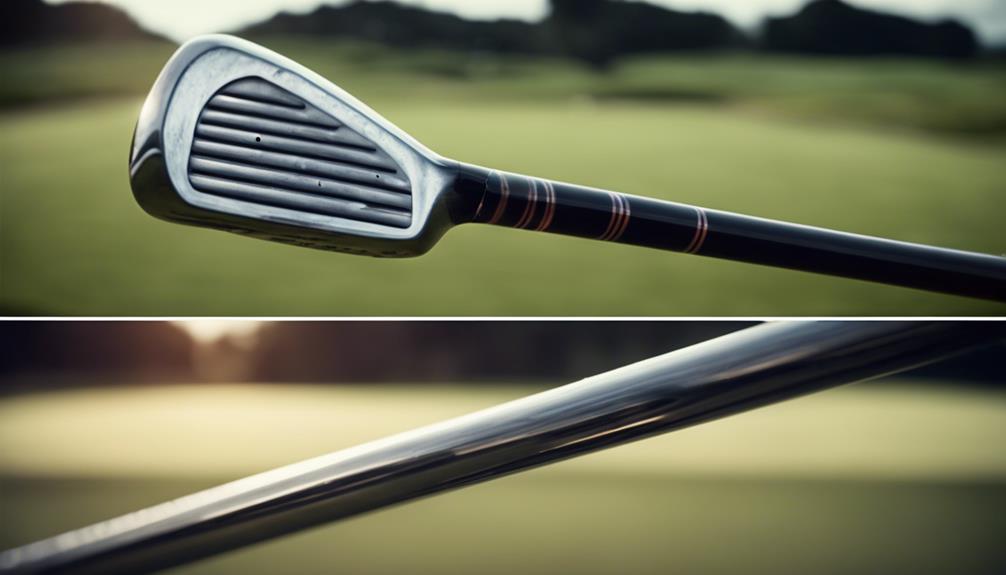
To reshaft a golf club in 10 easy steps, you'll need the right tools and a methodical approach. Start by gathering essential materials like a cut-off wheel, epoxy, and a steel brush. Safely remove the old shaft by applying moderate heat and gentle prying motion. Prepare the new shaft tip by roughening it with sandpaper and marking the insertion depth. Apply epoxy for a strong bond, then create a matte finish effect with a steel brush. Measure and cut the new shaft to the correct length, and smooth the cut edges perfectly. Assemble the club with care, and inspect and test the new shaft to verify it meets your specifications. With these steps, you'll be well on your way to a successful reshafting process, and with a little more attention to detail, you can achieve a truly professional result.
Key Takeaways
- Apply even heat to the hosel area to safely remove the old shaft, then clean it with a steel brush.
- Prepare the new shaft tip by roughening it with sandpaper, identifying the tip type, and marking the insertion depth.
- Mix epoxy resin and hardener in a 1:1 ratio, apply a small amount to the hosel, and rotate the shaft for an even coat.
- Ensure a secure grip installation by applying grip solvent, twisting the grip onto the shaft, and allowing it to dry for at least 24 hours.
- Measure, cut, and smooth the new shaft to the exact length needed, using a cut-off wheel and sandpaper for a clean finish.
Gather Essential Tools and Materials
Gather the necessary tools and materials needed for reshafting a golf club. These include a cut off wheel, epoxy, permanent marker, steel brush, and sandpaper. Additionally, you will need a grip, ferrule, steel shaft, tape measure, and a heat source.
You'll want to make sure you have a reliable heat gun, as it's essential for removing old adhesive and preparing the club head for the new shaft.
With your materials in hand, take a moment to inspect the ferrule. Verify that it matches the shaft size for a clean, professional finish.
Familiarize yourself with the epoxy mixing ratios and application tools. A strong bond between the shaft and club head is crucial.
Remember, the correct tools and materials are just the beginning – attention to detail and a steady hand will be important in the reshafting process. Take your time, and double-check your inventory before moving forward.
With everything in place, you'll be ready to tackle the next step: removing the old shaft safely.
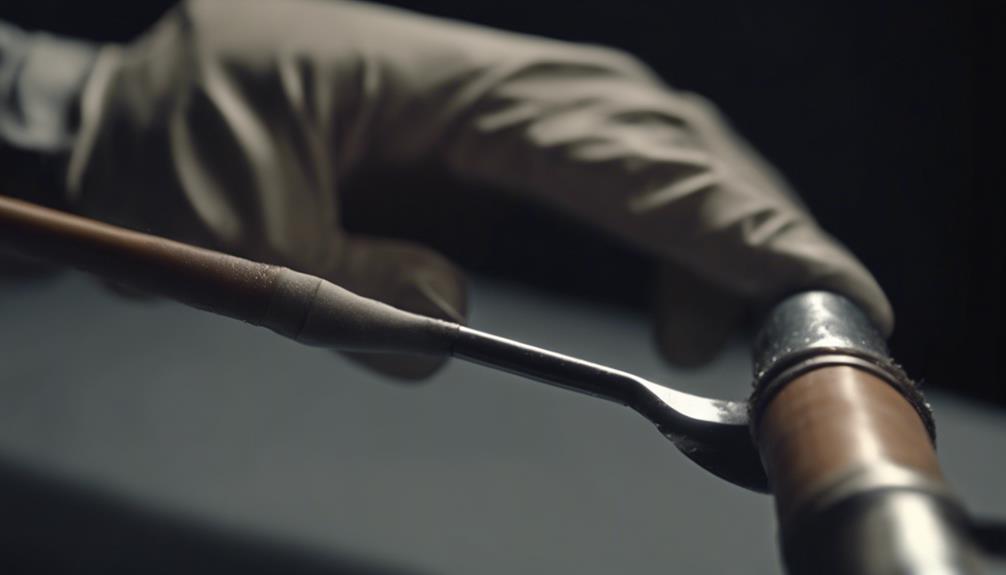
Remove the Old Shaft Safely
With your heat gun set to a moderate temperature, carefully apply even heat to the hosel area of the clubhead, softening the epoxy bond that holds the old shaft in place. This will help loosen the grip of the old shaft, making it easier to remove. As you heat the area, gently rock the shaft back and forth to further loosen the bond.
Once the epoxy is soft, use a gentle prying motion to carefully remove the old shaft from the clubhead. Be cautious not to apply too much pressure, as you don't want to damage the clubhead or hosel.
Next, use a steel brush to thoroughly clean the hosel, removing any debris or remnants of the old epoxy. It's vital to make sure all traces of the old epoxy are removed from the hosel before proceeding with the reshafting process.
Prepare the New Shaft Tip

You'll need to prepare the new shaft tip to guarantee a secure bond and peak performance of the club by roughening its surface, identifying its type, and marking the insertion depth. This essential step secures a snug fit in the hosel and prevents epoxy from entering the shaft.
Here's how to prepare the new shaft tip:
- Roughen the shaft tip with sandpaper to enhance adhesion between the shaft and the epoxy.
- Identify the tip type (parallel or taper) to ensure a proper fit in the hosel of the club head.
- Mark the shaft at the appropriate insertion depth based on the club head specifications.
- Wrap the shaft tip with tape to create a snug fit in the hosel and prevent excess epoxy from entering.
Apply Epoxy for a Strong Bond
Now that you've prepared the new shaft tip, it's time to apply epoxy for a strong bond.
You'll need to mix the epoxy correctly to guarantee its adhesive properties aren't compromised, and then apply it evenly to the shaft tip and hosel to assure full coverage.
Mixing Epoxy Correctly
To ensure a strong bond, blend one part epoxy resin with one part hardener, following the manufacturer's directions for the correct 1:1 ratio. This is essential, as an inaccurate mix can result in a feeble bond and a subpar reshafting job.
When blending the epoxy, make certain to:
- Thoroughly blend the resin and hardener for at least 30 seconds to achieve a consistent uniformity
- Mix until the color is uniform and there are no streaks or swirls
- Avoid introducing air into the mixture, as this can generate bubbles and weaken the connection
- Use a clean, dry mixing stick to prevent contamination and guarantee a smooth application
Applying Epoxy Evenly
With the epoxy mixture ready, apply a small, uniform amount to the inside of the hosel using a small stick or toothpick, establishing a strong bond with the new shaft. Be cautious not to apply too much epoxy, as excess can cause a messy application or impact the club's balance and performance.
Instead, focus on achieving an even coat by rotating the shaft while applying the epoxy. This will help prevent air pockets from forming and ensure a solid connection between the shaft and the club head.
As you insert the shaft into the hosel, wipe off any excess epoxy that squeezes out to maintain a clean appearance and top performance. It's crucial to allow the epoxy to cure for the recommended time, as specified on the packaging, to achieve a strong and durable bond.
Create a Matte Finish Effect
You'll achieve a superior bond between the epoxy and shaft by lightly roughening the surface with a steel brush to create a matte finish effect. This subtle texture not only enhances the appearance of the shaft but also provides a surface for the epoxy to adhere to, ensuring a strong and durable bond.
Here are some key considerations to keep in mind when creating a matte finish effect:
- Avoid excessive roughening, as this can weaken the shaft material and compromise the structural integrity of the club.
- The matte finish adds a professional touch to the reshafted club, improving the overall aesthetics and grip of the golf club.
- A clean and debris-free shaft surface is essential for a strong bond, so make sure to wipe it down before applying the epoxy.
- The matte finish effect is a critical step in reshafting a golf club, as it sets the stage for a successful epoxy application and a long-lasting bond.
Install the Grip and Ferrule
Now that you've achieved a professional-looking matte finish effect, it's time to focus on installing the grip and ferrule.
To make sure a secure and proper installation, you'll need to contemplate the grip selection criteria, including size, material, and texture, as well as ferrule sizing essentials to guarantee a precise fit.
Grip Selection Criteria
Selecting the right grip for your golf club involves analyzing four key factors: material, size, design, and aesthetics, as each plays a critical role in achieving a comfortable, consistent, and controlled swing.
When it comes to grip material, you'll want to contemplate what feels right for you. Do you prefer the softness of rubber, the durability of cord, or the versatility of synthetic? This is a personal preference, so take your time and experiment.
Here are the key factors to contemplate when selecting a grip:
- Material: Rubber, cord, or synthetic – each has its own unique characteristics for feel, durability, and traction.
- Size: Standard, midsize, or oversize – measure your hand to ensure a comfortable hold and proper control.
- Design: Round, ribbed, or reminder – choose a design that complements your grip style and promotes consistent hand placement.
- Aesthetics: Select a grip color and texture that match your personal style and provide a secure grip in various weather conditions.
Ferrule Sizing Essentials
When reshafting a golf club, selecting the correct ferrule size is essential to guarantee a secure and professional-looking installation. You'll want to choose a ferrule that matches your shaft diameter, as ferrules come in various sizes like .335', .350', and .370' for irons. This ensures a snug fit between the shaft and the hosel, preventing any unwanted movement during play.
Not only does a properly sized ferrule add a professional touch to the club, but it also protects the shaft from damage at the hosel. Ferrules can be made of plastic, metal, or composite materials, each offering unique benefits regarding aesthetics and durability. To make sure a clean and polished look, properly align the ferrule with the hosel and shaft before installing.
Take your time to select the correct ferrule size, as it's a vital step in achieving a masterful reshafting job. With the right ferrule sizing, you'll be one step closer to a professionally reshafted golf club that's ready for the course.
Secure Grip Installation
As you prepare to install the grip and ferrule, make sure the shaft is clean and dry to guarantee a secure bond between the grip and shaft. This essential step will ensure your golf clubs perform at their best.
To secure the grip and ferrule, follow these key steps:
- Apply grip solvent to the inside of the grip and the tape on the shaft to easily slide the grip on.
- Use a twisting motion while sliding the grip onto the shaft to ensure a secure and even fit.
- Allow the grip to dry for at least 24 hours before using the club to ensure a strong bond between the grip and the shaft.
- Slide the ferrule over the hosel and gently tap it into place to provide a finished look and protection for the shaft.
Remember to align the ferrule properly with the clubhead before finalizing the installation process.
Measure and Cut the New Shaft
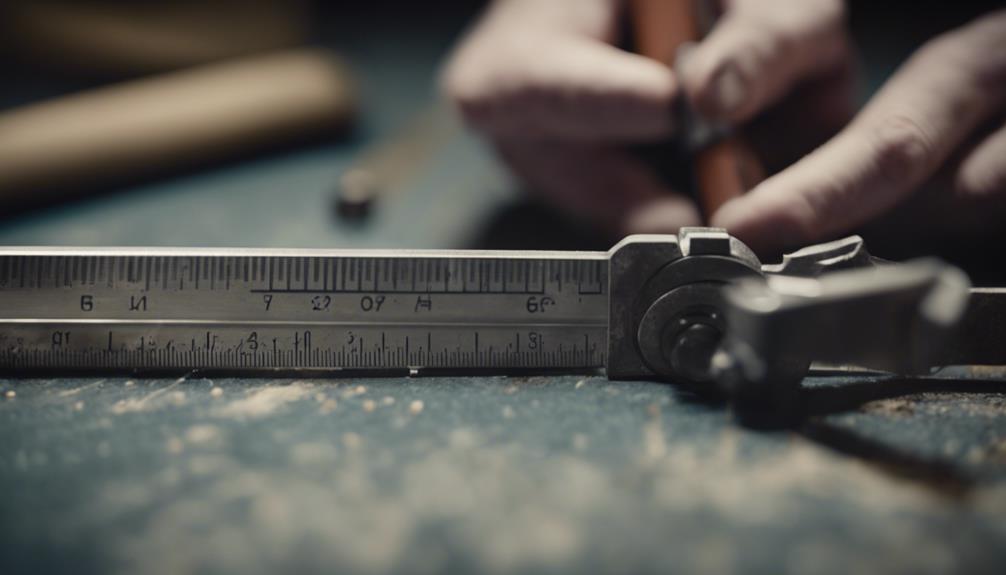
To precisely determine the length of your new shaft, align the tip with the hosel, making sure the clubhead sits flush with the ground, and measure from this position. This will give you the exact length you need for your golf club.
| Step | Action |
|---|---|
| Measure | Align tip with hosel, measure from this position |
| Mark | Use sharpie or tape to mark desired length on shaft |
| Cut | Use cut-off wheel to make a clean, straight cut |
Once you've measured and marked the shaft, use a cut-off wheel to make a clean and straight cut. Double-check the length after cutting to verify it matches the desired measurement before proceeding with the next steps in the reshafting process. Remember to smooth out any rough edges with sandpaper to prevent damage to the hosel during installation and to create a clean finish. By following these precise steps, you'll have a perfectly measured and cut shaft, ready for installation.
Smooth the Cut Edges Perfectly
With the shaft cut to length, you'll now focus on smoothing out the rough edges to achieve a clean finish. This step is important in maintaining the overall look and feel of the club, as well as securing a comfortable grip installation process.
To smooth the cut edges perfectly, follow these key steps:
- Use a fine-grit sandpaper to smooth out any rough edges left on the shaft after cutting.
- Make sure that the shaft edges are evenly sanded to prevent any potential grip installation issues.
- Concentrate on creating a clean and smooth finish on the cut edges to preserve the overall look and feel of the club.
- Take your time when sanding the edges to avoid any splintering or damage to the shaft material.
Assemble the Club With Care
Precisely positioning the shaft in relation to the hosel, you'll guarantee proper alignment before inserting and securing it with epoxy. This first step is essential, as it sets the stage for a strong and durable connection.
To make sure of accuracy, use a vice clamp or appropriate tool to keep the club steady during assembly, preventing any shifting or misalignment.
As you insert the shaft into the hosel, apply consistent force to create a robust bond between the components. Make sure to follow the manufacturer's instructions for epoxy application and curing times to secure a durable connection. Don't rush this process, as a quick assembly can lead to a weak joint.
Once the epoxy has cured, carefully inspect the assembled club for any imperfections or misalignments. Check the shaft's alignment, ensuring it's properly positioned with the clubhead. A meticulous approach here will yield benefits in the long run, resulting in a professional-looking finish.
Inspect and Test the New Shaft
After confirming the shaft is properly assembled, you should carefully examine the new shaft for any defects, dents, or imperfections that could impact its performance. A thorough inspection will save you from potential headaches down the line.
Here are some key things to check:
- Verify the flexibility and weight of the new shaft match the desired specifications for the club.
- Confirm the tip of the new shaft is compatible with the hosel of the club head.
- Compare the length of the new shaft to the original shaft to make sure it will achieve the desired club length after installation.
- Check for any visible defects, dents, or imperfections that could impact performance.
If you're uncertain about the suitability of the new shaft for the club, don't hesitate to seek advice from a professional club fitter or golf technician. Their expertise will give you peace of mind and guarantee your club is optimized for peak performance.
Frequently Asked Questions
How Do You Reshaft a Golf Club?
You'll start by selecting a suitable shaft material, considering factors like weight, torque, and flex, then carefully prep the new shaft by roughening the tip, determining the tip type, and marking it for precise alignment.
What Are the Steps in a Golf Shaft?
You'll select a golf shaft from various materials, such as graphite, steel, or hybrid, considering factors like weight, flexibility, and torque, then proceed to prep and install it, ensuring a precise fit and best performance.
How Much Does It Cost to Get a Set of Clubs Reshafted?
"Think you're breaking the bank on new clubs? You're not alone! You'll be surprised to find that reshafting a set can cost between $15 to $40 per club, but do your cost comparison to snag the best deal."
How Do You Cut a Golf Shaft at Home?
You'll accurately measure the desired shaft length, mark the cutting point, and use a cutting tool like a cutoff wheel to make a precise cut, avoiding shaft lengthening, and ensuring a clean, smooth edge for a secure grip installation.
Conclusion
You've conquered the challenge, and your golf club is reborn!
With every swing, the new shaft will hum like a finely tuned instrument, its precision and power coursing through your veins.
Your meticulous work has paid off, and the results are music to your ears.
The club now sings with a renewed vigor, ready to take on the course and conquer the greens.